x
... loading movie ...

Several NVIDIA GeForce GTX GPUs, and the NVIDIA GeForce GTX SLI Bridge, feature illuminated LEDs that can now be controlled with the new GeForce Experience “NVIDIA GeForce GTX LED Visualizer” module. Included with all installs of GeForce Experience, the new module allows GeForce GTX users to customise the brightness and animation of the illuminated “GeForce GTX” text, adding patterns and effects that further enhance the personality of your PC. On the SLI bridge, the illumination and animation of the GeForce GTX Claw logo can be similarly controlled.
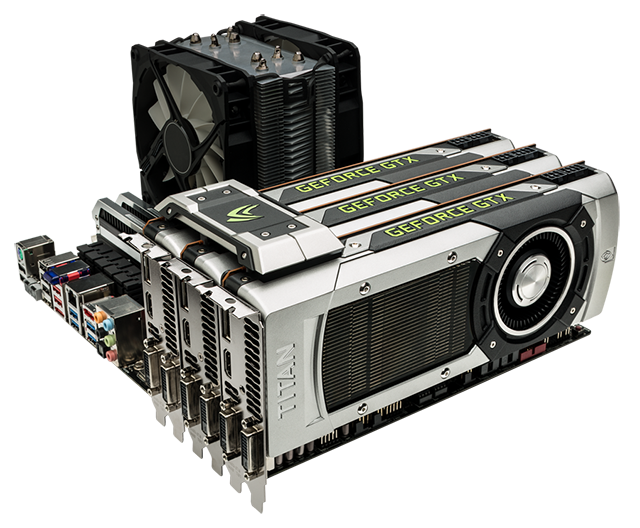
The ultra-desirable illuminated GeForce GTX SLI Bridge is available exclusively through the purchase of a GeForce GTX Battlebox.
To get started, all you need is GeForce Experience 1.7, included with all GeForce drivers, beginning with 331.65 WHQL. When installed, you’ll be able to use the following effects to customise your LEDs:
Configure the LEDs to be turned on at a brightness level of your choosing, or to flash in a number of different patterns across multiple LEDs.
Configure the speed of available animation patterns to correspond to a GPU activity level, such as GPU temperature, clock speed, fan speed, or utilisation. If you choose a steady brightness and no flashing, then the brightness will change as the GPU activity changes.
Configure the LEDs to respond to audio, such as when playing games.
Configure the LEDs to act as an alarm to alert you, for example, when a GPU temperature or fan speed threshold has been reached.
Configure the LEDs to turn on only when SLI mode is enabled.
Turn to the next page for system requirements, or head straight to page three for detailed configuration instructions.
General System Requirements
Supported Hardware
| GPU | LED Logo | SLI LED Support |
| GeForce GTX TITAN | Yes | Yes |
| GeForce GTX 780 Ti | Yes | Yes |
| GeForce GTX 780 | Yes | Yes |
| GeForce GTX 770 | Yes | Yes |
| GeForce GTX 690 | Yes | No |
After you have installed GeForce Experience 1.7, the LED Visualizer module can be accessed through a dedicated tab in the application itself.
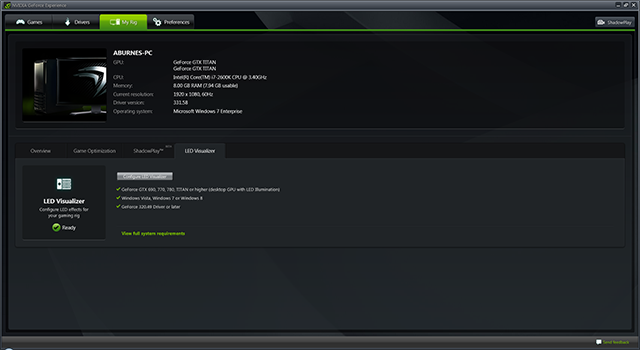
Clicking the "Configure LED Visualizer" button opens the LED Visualizer module, giving you access to its configuration features.
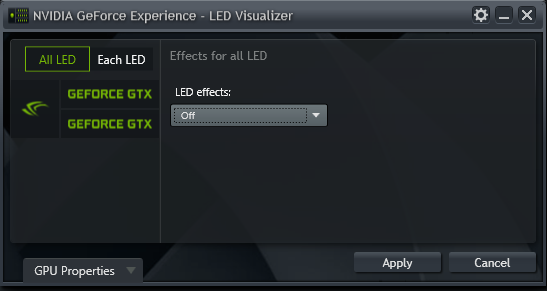
The left pane of the new LED Visualizer window gives you the option of applying identical effects to multiple GPUs and the GeForce GTX SLI Bridge simultaneously with the "All LEDs" button, or different effects to each with "Each LED".
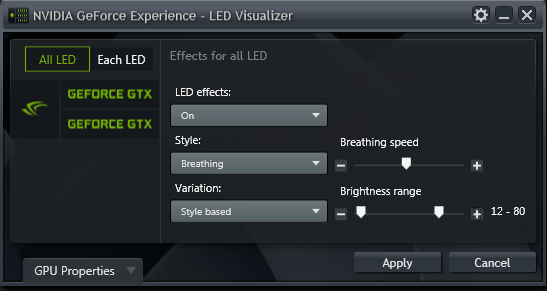
If you do select "Each LED", you must specify the GPU or SLI Bridge to be configured by clicking it on the graphical display below the All LED-Each LED toggle. The selected item will be highlighted and the name on the right pane changed to reflect your choice.
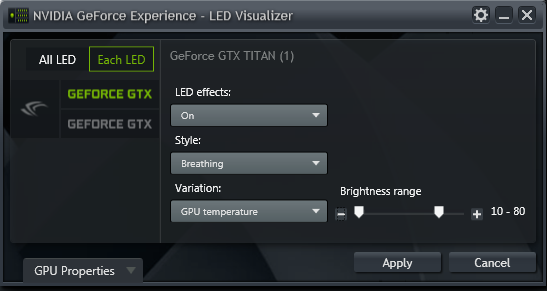
With the LED Visualizer, the LEDs on your GeForce GTX hardware can be configured in a multitude of ways, which we will now detail. For best results, we recommend the ‘Each LED’ mode, giving you greater flexibility in the range of effects you can apply.
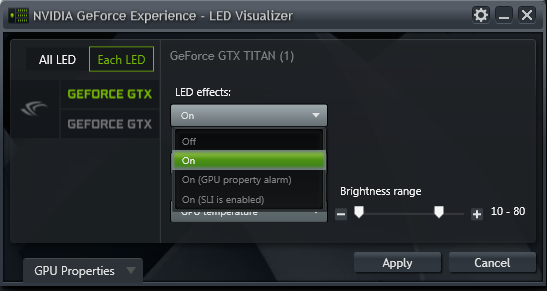
The table below details the general effect each setting has on your LEDs:
LED Effects Setting |
Description |
Off |
LEDs are disabled. |
On |
LED animation is activated. |
On (GPU Property Alarm) |
LED animation activates whenever the specified GPU property level is met or exceeded. |
On (SLI Is Enabled) |
LED animation activates when SLI is enabled (requires GeForce GTX SLI bridge connector). |
The slider to the right of the “Style” dropdown determines the frequency of the effect, or its speed, depending on the effect chosen.
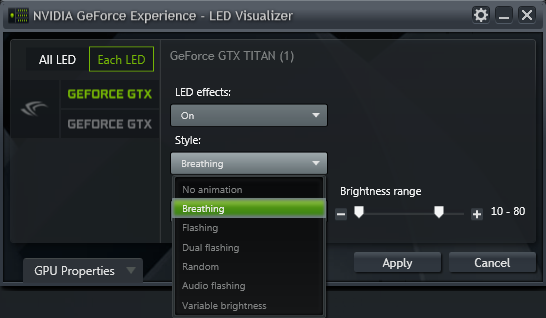
The table below details each effect, and states whether the illuminated SLI Bridge is required, and whether the “All LED” setting has to be used instead of “Each LED” mode.
Animation Style |
Description |
SLI LED Required |
“All LEDs” Required |
Breathing |
LED brightness changes between minimum and maximum levels with slight delays at the extremes, simulating a breathing pattern. |
|
|
Audio Flashing |
LED brightness flashes in sync with audio activity from the computer, such as from a media player or game. |
|
|
Flashing |
LED brightness smoothly changes between minimum and maximum levels. |
|
|
Dual Flashing |
LEDs flash twice per animation cycle. |
|
|
Random |
Randomly selects an animation style and alternates the selection with the breathing pattern. The entire pattern becomes: First random selection > Breathing cycle > Second random selection... etc. |
|
|
Variable Brightness |
Combines with the “Variation” setting to adjust the brightness of the LEDs based on GPU temperature and other options. Please note that the setting is not available if “All LEDs” is selected. |
|
|
No Animation |
LED brightness is steady. Use the brightness slider to determine LED brightness. |
|
|
Electric |
LED brightness switches quickly between minimum and maximum levels; the "quick flash" travels in a linear manner between all the LEDs. |
X |
X |
Flow In |
First the SLI Bridge LED brightness goes from minimum to maximum, after which all the GPU LEDs go from minimum to maximum brightness. This gives the impression of light flowing from out (SLI) to in (GPU). |
X |
X |
Flow Out |
First all the GPU LEDs go from minimum to maximum brightness, after which the SLI Bridge LED brightness goes from minimum to maximum. This gives the impression of light flowing from in (GPU) to out (SLI). |
X |
X |
Reverse Breathing |
The SLI Bridge LEDs and remaining GPU LEDs “breathe” separately in a linear pattern. |
X |
X |
Wave |
Requires three GPU LEDs (3x GPU, or 2x GPU and 1x illuminated SLI Bridge). The LED brightness increases to maximum for each GPU sequentially, followed by the SLI bridge LED (if present), and then sequentially decreases to minimum. |
|
X |
Ripple |
Each GPU LED Breathes sequentially, followed by the SLI Bridge LED blinking. |
|
X |
Many of the “Styles” can be further modified using the “Variation” dropdown, which allows users to customise the brightness of LED effects, and whether effects respond to things like GPU activity and GPU temperature.
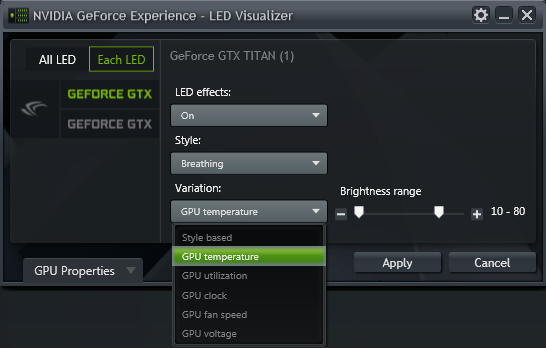
Depending on the Variation and LED Effect mode you use, options are added and removed. The tables below detail these in full.
Variation |
Description |
Style Based |
LED animation is controlled by one of the active animation styles. The speed is set by the position of the Style speed slider. |
GPU Temperature |
LED animation speed varies with the GPU temperature. If Variable Brightness selected, then LED brightness varies with the GPU temperature. |
GPU Utilization |
LED animation speed varies with GPU utilization. If Variable Brightness selected, then LED brightness varies with GPU utilisation. |
GPU Clock Speed |
LED animation speed varies with the GPU clock speed. If Variable Brightness selected, then LED brightness varies with the clock speed. |
GPU Voltage |
LED animation speed varies with GPU voltage. If Variable Brightness selected, then LED brightness varies with GPU voltage. |
GPU Fan Apeed |
LED animation speed varies with the GPU fan speed. If Variable Brightness selected, then LED brightness varies with GPU fan speed. |
Variation |
Description |
GPU Utilisation Limit |
LED animation is active as long as the specified GPU utilization level is met or exceeded. |
GPU Temperature Limit |
LED animation is active as long as the specified GPU temperature is met or exceeded. |
GPU Clock Speed Limit |
LED animation is active as long as the specified GPU clock speed is met or exceeded. |
GPU Fan Speed Limit |
LED animation is active as long as the specified GPU fan speed is met or exceeded. |
GPU Voltage Limit |
LED animation is active as long as the specified GPU voltage level is met or exceeded. |
Variation |
Description |
Style Based |
LED animation is controlled by one of the active animation styles. The speed is set by the position of the Style speed slider. |
Variation |
Description |
Fixed brightness |
Sets the brightness according to the Brightness slider. |
The huge number of variations gives you many many ways to customise and personalize your system’s GeForce GTX lighting. Make sure to share your favourites on the GeForce GTX forums.
Beneath the LED configuration area is a “GPU Properties” button, which expands the window to show current system stats.
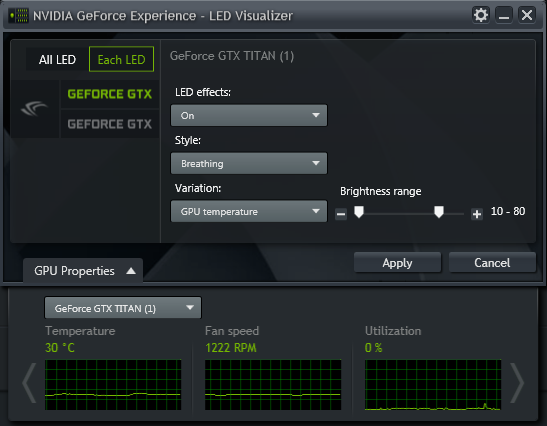
In addition to showing real-time system stats, the Properties panel adds a red line displaying the user-selected alarm limits when using “On (GPU Property Alarm)” LED Effects.
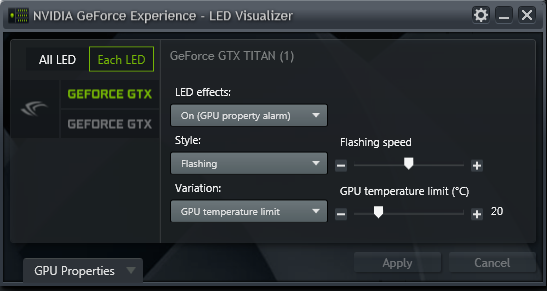
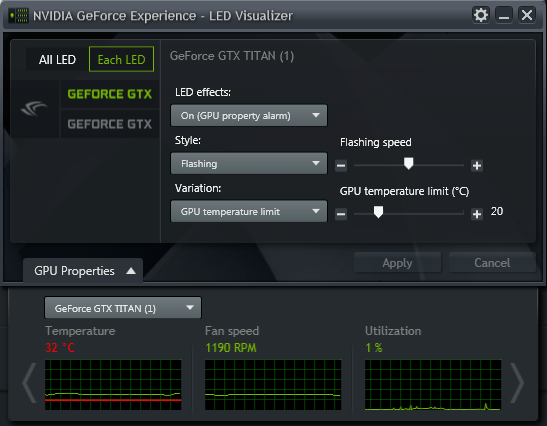
With these and the many other tools available in this GeForce Experience 1.7 LED Visualizer module, you can personalize your system’s lighting to your heart’s content. If you’d like to see any additional modes or features added to the LED Visualizer Module please let us know on the GeForce Experience forums.