Watch Dogs 2 Graphics And Performance Guide
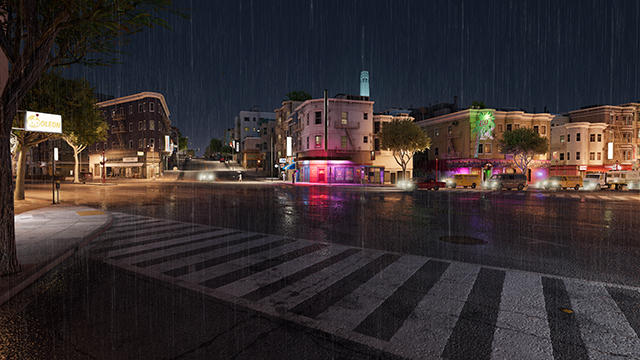
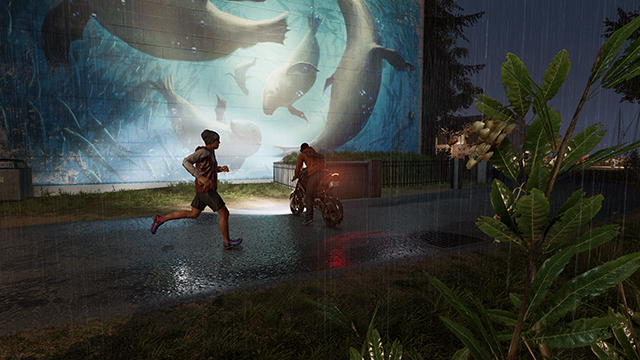
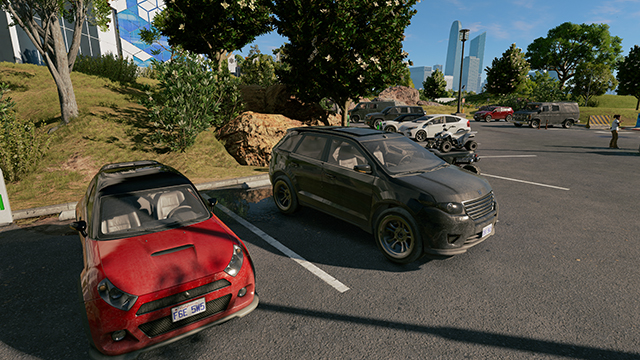
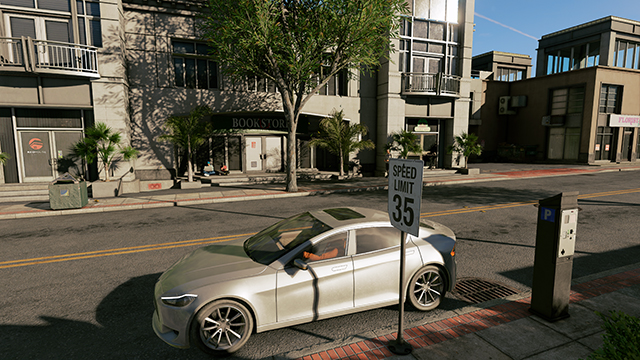
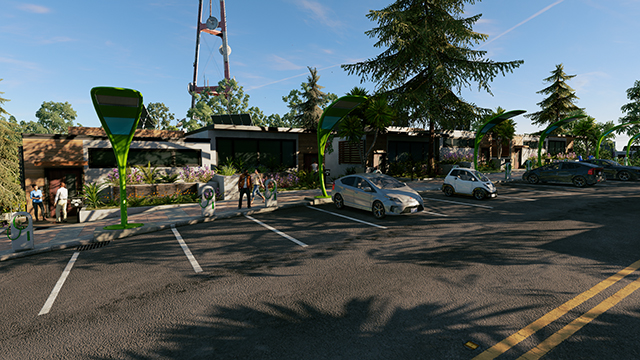
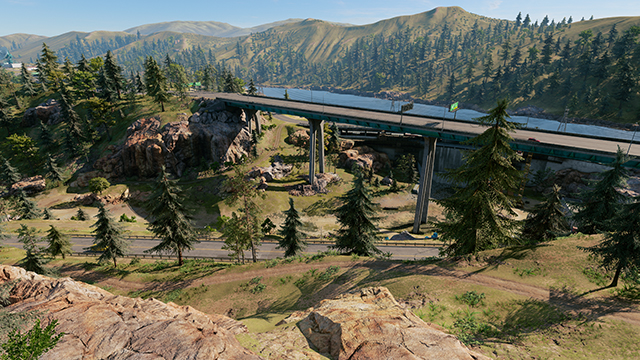
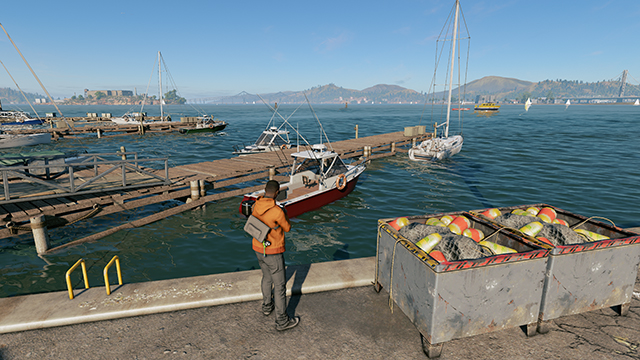
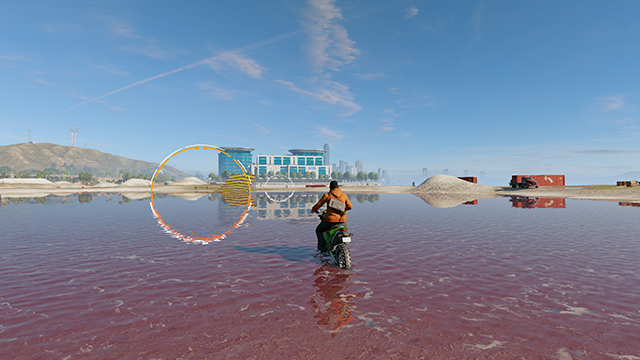
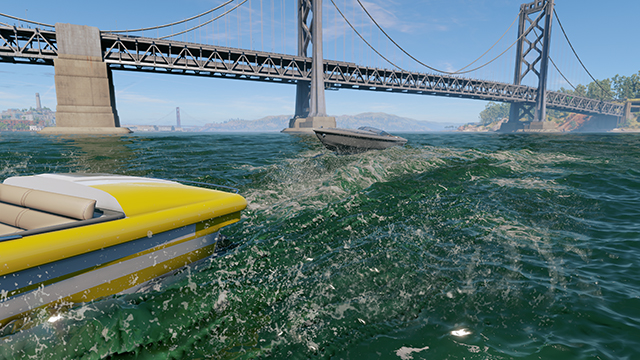
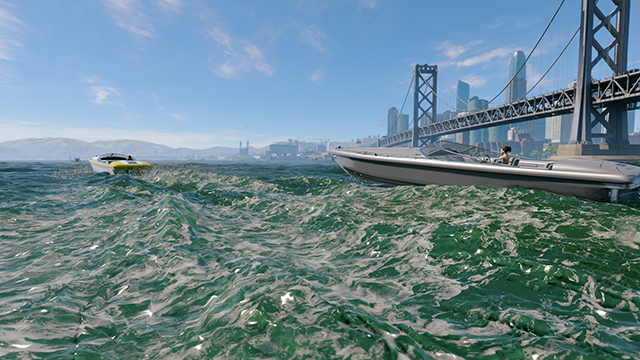
Watch Dogs 2 has received excellent reviews on consoles, and now the PC edition is available on Uplay and other digital distribution services. Featuring a stylized recreation of San Francisco, the game boasts plenty to see and do, and on PC its incredible amount of content will be rendered at a significantly higher level of detail, and be further enhanced by PC-exclusive visual effects.
In total, Watch Dogs 2 features 19 graphics settings, along with the usual array of doodads that PC gamers expect to find in the latest releases. Furthermore, its graphical fidelity is bolstered through the addition of HBAO+, HFTS, PCSS, TXAA, and at a future date, Photo Mode. Additionally, gamers who play on GeForce GTX GPUs benefit from the inclusion of support for DSR, GameStream, GeForce Experience Share, SLI, and Surround.
In this guide you can examine the impact of Watch Dogs 2's graphics settings on image quality and performance, see examples of the aforementioned technologies in action with screenshots and interactive comparisons, and discover how fast our range of GPUs run with settings cranked up far beyond the level of detail possible on other platforms.
To start things off, and give you an idea of how Watch Dogs 2 looks with max settings enabled, check out our Watch Dogs 2 PC technology trailer:
Download a higher-quality version of the tech trailer here
Guide Contents:
- System Requirements
- Graphics Settings
- Ambient Occlusion
- Bloom
- Depth of Field
- Extra Details
- Geometry
- Headlight Shadows
- Motion Blur
- Multisample Anti-Aliasing
- Pixel Density
- Post-Process Anti-Aliasing
- Reflections
- San Francisco Fog
- Screen Space Reflections
- Shadows
- Temporal Filtering
- Terrain
- Texture Filtering
- Texture Resolution
- Vegetation
- Water
- Settings Wrap-Up
- NVIDIA Dynamic Super Resolution
- GeForce Experience: Optimal Playable Settings With A Single Click
- Game Ready Watch Dogs 2 Driver
- Overclocking
- G-SYNC: Eliminating Stutters & Tearing For The Ultimate Experience
- NVIDIA Surround
- Conclusion
System Requirements
Pre-release, Ubisoft recommended GeForce GTX gamers gear up a GeForce GTX 1060 for an excellent Watch Dogs 2 experience at 1920x1080, the most popular gaming resolution.
Minimum System Requirements
- CPU: Intel Core i5-2400S @ 2.5 GHz / AMD FX 6120 @ 3.5 GHz
- GPU: GeForce GTX 660
- VRAM: 2GB
- RAM: 6GB
- OS: Windows 7 SP1, Windows 8.1, Windows 10 (64-bit versions only)
- HDD: 50GB free space
Recommended System Requirements
- CPU: Intel Core i5-3470 @ 3.2 GHz / AMD FX 8120 @ 3.9 GHz
- GPU: GeForce GTX 780, GeForce GTX 970, or GeForce GTX 1060
- VRAM: 3GB
- RAM: 8GB
- OS: Windows 7 SP1, Windows 8.1, Windows 10 (64-bit versions only)
- HDD: 50GB free space
To discover how the Recommended System Requirements fare in real-world testing, be sure to check out our GeForce GTX GPU benchmarks later on.
Watch Dogs 2 Graphics Settings
Watch Dogs 2 includes 19 options that affect game performance and graphical fidelity, in addition to the resolution, field of view and VSync options PC gamers expect to see in games. Below, we've thoroughly examined each and every option, demonstrating their image quality with interactive screenshot comparisons, and their performance with benchmarks.
Additionally, we've tested overall game performance on many GeForce GTX 900 and 10-Series GPUs, revealing the framerates you'll receive at Ultra settings at the three most common gaming resolutions.
Ambient Occlusion
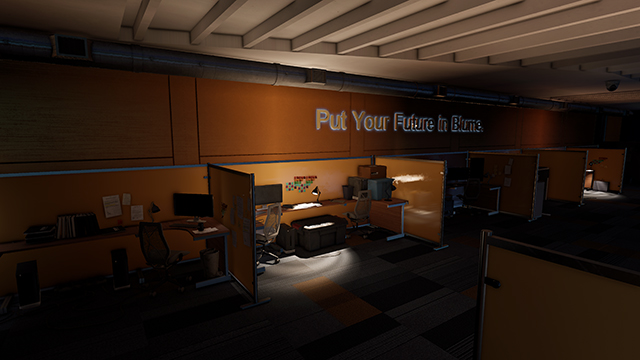
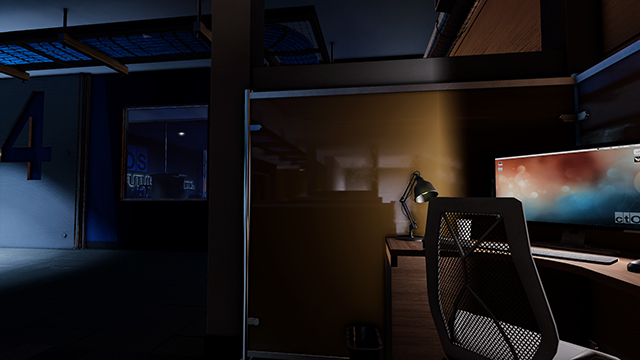
Ambient Occlusion (AO) adds contact shadows where two surfaces or objects meet, and where an object blocks light from reaching another nearby game element. The AO technique used and the quality of the implementation affects the shadowing's accuracy, and whether new shadows are formed when the level of occlusion is low. Without Ambient Occlusion scenes look flat and unrealistic, and objects appear as if they're floating.
In Watch Dogs 2, players can choose from three Ambient Occlusion techniques. The first, HMSSAO, is a Ubisoft-developed modification of SSAO, seen in the original Watch Dogs under a different name, and as "SSAO" in Assassin's Creed Syndicate and other Ubisoft titles. Of late however HMSSAO has fallen out of favor following the introduction of the newer and better Ubisoft-developed SSBC, seen on PC in Far Cry 4 and Rainbow Six Siege, and in most of Ubisoft's current-generation console games, including Watch Dogs 2.
For the PC release of Watch Dogs 2, we've worked with Ubisoft to implement the game's third AO option, HBAO+. A higher-quality technique, HBAO+ leverages the capabilities of modern PCs to render more detailed, more precise Ambient Occlusion shadowing, enhancing virtually every scene in the entire game. Subtle details that previously lacked shadowing are layered from the world around them with HBAO+, and the accuracy and fidelity of all existing AO shadowing is vastly improved.
For exemplification of these benefits take a close look at the interactive comparisons below. You'll see richer contact shadows around the smallest of objects and details, improvements to shadows rendered by HMSSAO and SSBC, and much more.
| Interactive Comparisons | ||
| NVIDIA HBAO+ vs. Ubisoft SSBC | NVIDIA HBAO+ vs. Ubisoft HMSSAO | NVIDIA HBAO+ vs. Off |
| Ubisoft SSBC vs. Ubisoft HMSSAO | Ubisoft SSBC vs. Off | Ubisoft HMSSAO vs. Off |
Outdoors, HBAO+ offers similar benefits, adding natural shadowing to tufts of grass and other pieces of foliage. In the interest of fairness, it's worth pointing out that HBAO+ does trade some long range AO shadowing for improved short and mid-range detail (noticeable when comparing HBAO+ to HMSSAO), but in our opinion this is a worthwhile exchange given the greater visibility of game elements in the foreground.
| Interactive Comparisons | ||
| NVIDIA HBAO+ vs. Ubisoft SSBC | NVIDIA HBAO+ vs. Ubisoft HMSSAO | NVIDIA HBAO+ vs. Off |
| Ubisoft SSBC vs. Ubisoft HMSSAO | Ubisoft SSBC vs. Off | Ubisoft HMSSAO vs. Off |
Up close, only HBAO+ can correctly account for the position of the sun and current conditions, correctly adding darker AO shadows to the underside of geometry.
| Interactive Comparisons | ||
| NVIDIA HBAO+ vs. Ubisoft SSBC | NVIDIA HBAO+ vs. Ubisoft HMSSAO | NVIDIA HBAO+ vs. Off |
| Ubisoft SSBC vs. Ubisoft HMSSAO | Ubisoft SSBC vs. Off | Ubisoft HMSSAO vs. Off |
In the bright urban areas of San Francisco, Ambient Occlusion has less of an influence on image quality than in many other games, though if you look closely it's still working away to add shadows and depth to every object, surface, and piece of geometry.
| Interactive Comparisons | ||
| NVIDIA HBAO+ vs. Ubisoft SSBC | NVIDIA HBAO+ vs. Ubisoft HMSSAO | NVIDIA HBAO+ vs. Off |
| Ubisoft SSBC vs. Ubisoft HMSSAO | Ubisoft SSBC vs. Off | Ubisoft HMSSAO vs. Off |
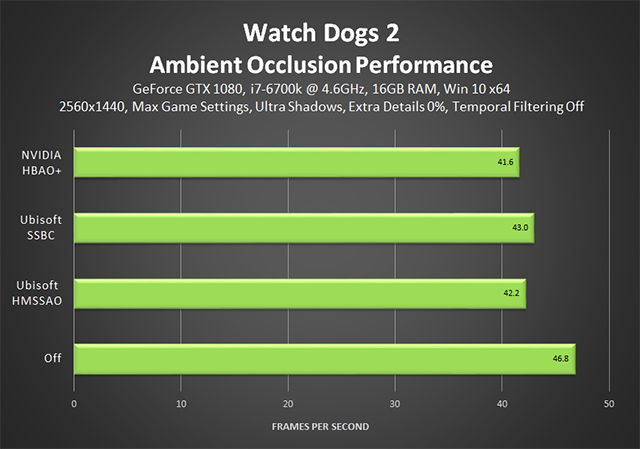
Performance: Performance for a specific effect fluctuates from engine to engine, and here in the upgraded Watch Dogs 1 Disrupt engine we find Ambient Occlusion to be a comparatively 'cheap' effect, costing at most 5 frames per second. And as all three AO techniques run at similar speeds you can choose the technique you like the look of most.
In our opinion, HBAO+ delivers the best overall effect, while HMSSAO offers increased AO visibility over long ranges, though not with great accuracy. SSBC, meanwhile, offers improved indoor AO shadows compared to HMSSAO, but below the quality of those from HBAO+. Ultimately, the choice is yours.
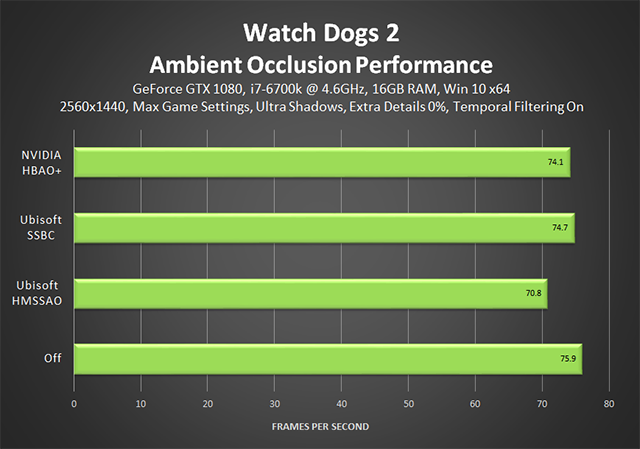
A technique called "Temporal Filtering" can be activated to significantly improve performance in Watch Dogs 2, and on two occasions in the course of our testing we found this setting to affect the deltas between options in a setting. For Ambient Occlusion, the following chart shows performance when "Temporal Filtering" is enabled.
With the reduced cost of HBAO+ in this mode, and the generally improved level of performance, HBAO+ and SSBC are far cheaper to enable, making them suitable for virtually all systems.
Bloom
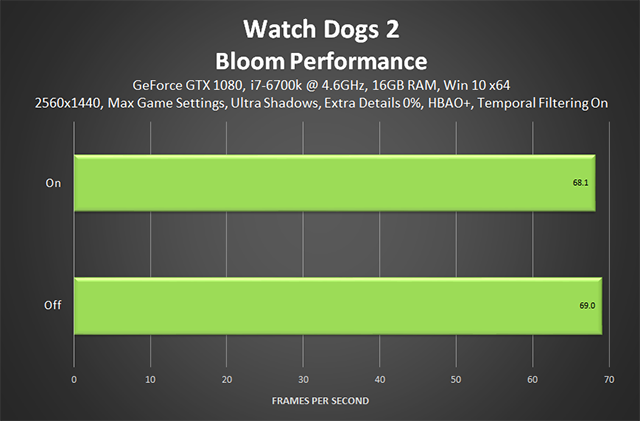
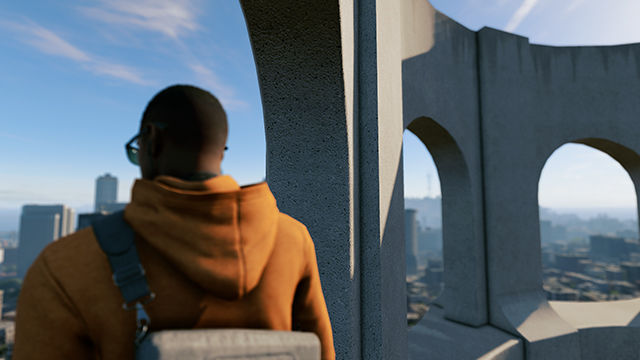
For the majority of Watch Dogs 2 "Bloom" has a negligible impact on image quality, adding only subtle detail to select interior lights, and bright light around the Sun, which doesn't affect the game's lighting when disabled.
Performance: Costing less than 1 frame per second, "Bloom" is a nice-to-have setting, but is by no means essential given its minimal contribution to overall fidelity.
Depth of Field
Out of focus, stylistic depth of field blurring occurs during in-game cinematics and scripted moments, when aiming at enemies with weapons, and when game elements are in front or behind the focal point of the player's adjustable third-person camera, as shown below.
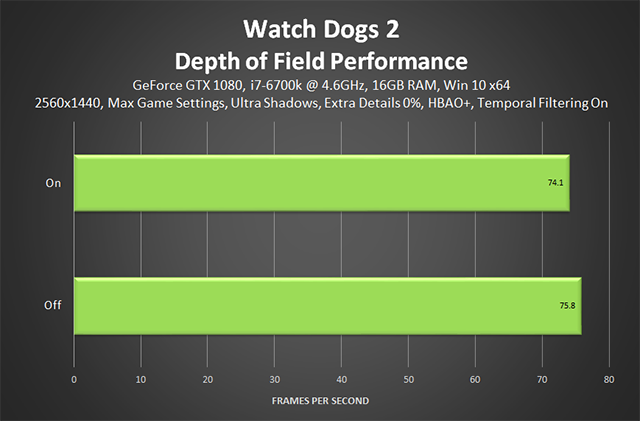
Performance: "Depth of Field" can cost a few more frames during in-engine cinematics, but for the most part you're looking at a couple frames per second during general gameplay.
Extra Details
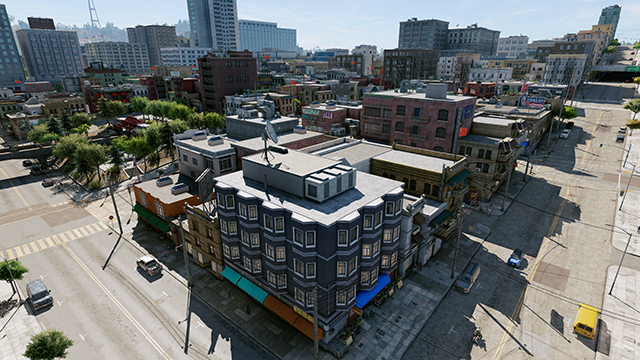
If you wish to improve object and geometry detail as far as the eye can see, "Extra Details" is the setting for you. Be warned though, CPU load and draw calls will increase considerably, potentially bottlenecking GPU performance, in turn decreasing the framerate by a significant degree.
In the interactive comparisons below you can see the improvements to distant terrain, foliage, trees, cars, street scenery, rooftop objects, building windows, building geometry, and much more. You can even observe road markings being rendered from further away, car windows becoming transparent to render the interiors of vehicles and the drivers within, and extra shadows and Ambient Occlusion shadows being rendered through the addition of new detail.
In addition to increased image quality and immersion, from being able to see more 'stuff' at once, the other benefit of "Extra Details" is that you reduce pop-in, fade-in, and visible level of detail transitions when traveling quickly through an environment.
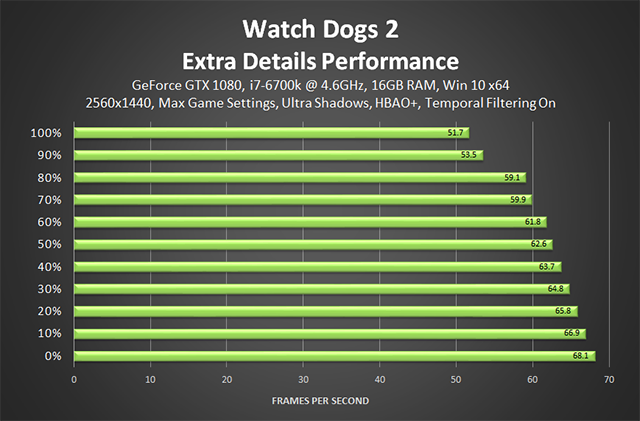
Performance: When you select Watch Dogs 2's Ultra graphics preset, "Extra Details" remains at 0%, such is its impact on performance on anything less than the very best CPUs. Even then, we measured a 16.4 FPS cost on an i7-6700K, running at 4.6GHz. If you've got fewer cores, a lower clock speed, or are on an older architecture, you'll likely see the cost of this demanding setting increase further still.
Geometry
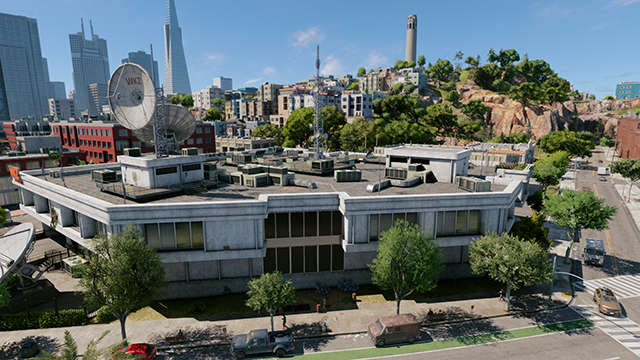
"Geometry" primarily deals with object and geometry detail, and visibility, at near and middle-ranges, leaving the adjustment of distant detail to the demanding "Extra Details" setting.
In the interactive comparisons below you can observe the setting's impact on litter, benches, fire hydrants and larger objects in the foreground, and on buildings and terrain further into the scene. Also, note the lack of change on trees, which are greatly improved by "Extra Details".
| Interactive Comparisons | ||
| Ultra vs. Very High | Ultra vs. High | Ultra vs. Medium |
| Ultra vs. Low | Very High vs. High | Very High vs. Medium |
| Very High vs. Low | High vs. Medium | High vs. Low |
| Medium vs. Low | ||
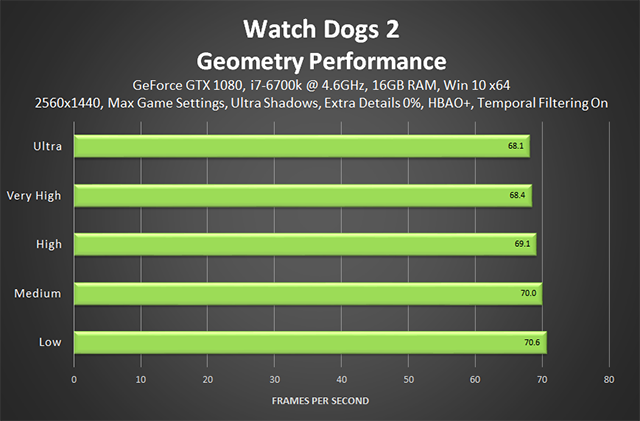
Performance: Basic geometry improvement has a minimal impact on performance in our test, though the cost will rise slightly on older CPUs.
Headlight Shadows
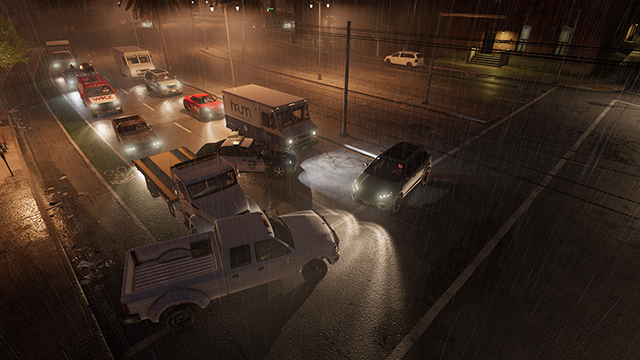
Enable "Headlight Shadows" if you'd like new shadows to be cast as a result of illumination from vehicle headlights. At its most basic, the setting enables the vehicle you're driving to cast shadows, though it can also be cranked up to make the four nearest NPC-controlled vehicles cast shadows, too.
In motion it's an impressive effect, with new shadows stretching across the scene as you drive past, through or over traffic, or when being chased by several police cars. For the purposes of this guide, however, a contrived scenario was required to adequately demonstrate the effect:
| Interactive Comparisons | ||
| 4 Cars vs. 3 Cars | 4 Cars vs. 2 Cars | 4 Cars vs. Your Car |
| 4 Cars vs. Off | 3 Cars vs. 2 Cars | 3 Cars vs. Your Car |
| 3 Cars vs. Off | 2 Cars vs. Your Car | 2 Cars vs. Off |
| Your Car vs. Off | ||
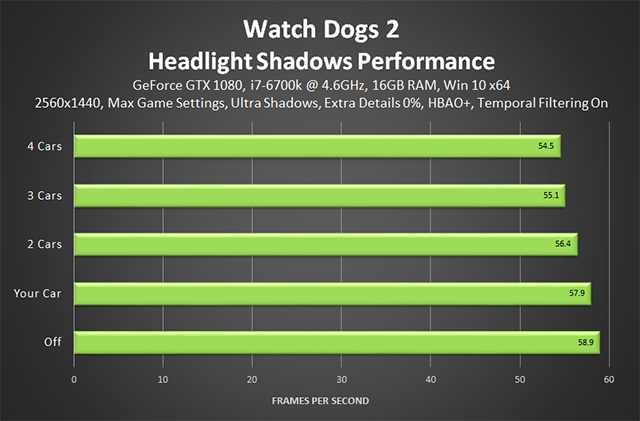
Performance: In our scenario "Headlight Shadows" has a surprisingly small impact on performance, though it is worth noting that performance deltas will change from scene to scene, and if you use better or worse "Shadows".
Multisample Anti-Aliasing
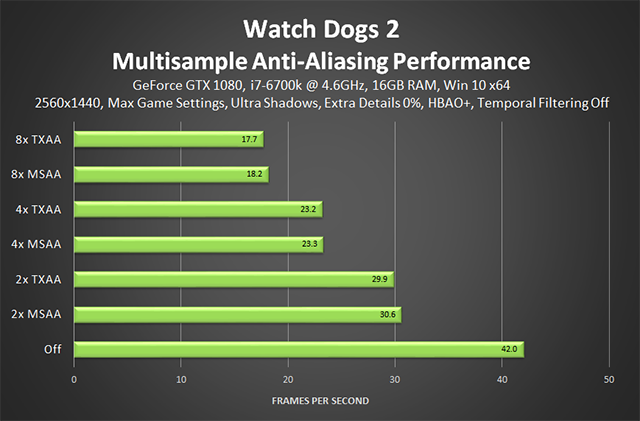
If you opt out of using "Temporal Filtering" to drastically improve performance, you can enable one of six hardware anti-aliasing options to decrease the visibility of jagged edges. On offer are 2x, 4x and 8x versions of MSAA, and 2x, 4x and 8x versions of the NVIDIA-exclusive, MSAA-based TXAA.
For Watch Dogs 2 we've upgraded TXAA to a new version, referred to internally as "TXAA 3.0". Compared to the TXAA seen in games previously, the new version used here in Watch Dogs 2 switches from a Gaussian blur to sample filtering, vastly reducing the blurring that was clearly visible at 1920x1080. Furthermore, TXAA 3.0 increases maximum quality from 4x to 8x, and introduces some other secret sauce that further improves the quality of its edge and temporal anti-aliasing.
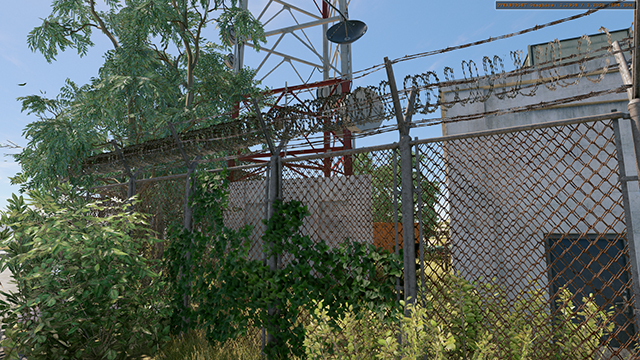
In screenshots, the new TXAA appears virtually identical to MSAA, and so lacks the temporal and transparency anti-aliasing visible during gameplay. Nevertheless, TXAA is presented below in our interactive comparisons, along with the SMAA and FXAA options from the "Post-Process Anti-Aliasing" setting.
In stills, it's clear that there's no perfect anti-aliasing solution: when aliasing on the lower half of the building is tackled some clearly remains on the upper half, and vice versa. TXAA eliminates almost all of this aliasing in motion, but assuming you can't or don't want to use TXAA, the best option is to combine MSAA with SMAA, giving you good edge anti-aliasing scene wide, along with transparency anti-aliasing on foliage, visual effects and other game elements. Take a look at this comparison to see the combo strut their stuff.
Performance: MSAA's never been an inexpensive effect, so it should come as no surprise that 2x costs over 10 FPS, and 4x nearly 20 FPS. As such, anyone without a high-end PC should instead use "Post-Process Anti-Aliasing" and "Temporal Filtering". And even if you do have a high-end PC, consider spending your 10-30 FPS on better shadows, extra geometry detail, or another visual effect instead.
Pixel Density
Upscale or downsample your rendering resolution with the "Pixel Density" setting. Similar options in other games are called "Render Scale" or "Render Resolution", and with them and Watch Dogs 2's "Pixel Density" you can increase or decrease the internal rendering resolution of a game's graphics to improve graphical fidelity or increase performance, respectively. The added benefit over externally-applied methods of upscaling and downsampling is that the HUD and menus are rendered at your selected screen resolution, giving you a usable user interface even if the game's graphics are rendered at 640x360 on a 32" 3840x2160 monitor.
Unfortunately, Watch Dogs 2's implementation of this technique tops out at 1.25x, giving you a maximum rendering resolution of 2400x1350 on a 1920x1080 screen. If you wish to hit a higher resolution, such as 2560x1440 or 3840x2160, you'll need to use NVIDIA Dynamic Super Resolution instead.
Below, you can see the benefits of raising the internal rendering resolution with "Pixel Density" or any other technique: detail is sharper and clearer, and aliasing is reduced.
| Interactive Comparisons | ||
| 1.25 vs. 1.00 | 1.25 vs. 0.75 | 1.25 vs. 0.50 |
| 1.25 vs. 0.25 | 1.00 vs. 0.75 | 1.00 vs. 0.50 |
| 1.00 vs. 0.25 | 0.75 vs. 0.50 | 0.75 vs. 0.25 |
| 0.50 vs. 0.25 | ||
Performance: With "Temporal Filtering" enabled, 1.25x costs us 3.2 FPS more, and prevents us from upscaling for obvious reasons.
Post-Process Anti-Aliasing
Most Watch Dogs 2 players will find "Multisample Anti-Aliasing" far too taxing, instead using "Post-Process Anti-Aliasing" for good-enough anti-aliasing that costs just a few frames per second. Moreover, "Post-Process Anti-Aliasing" is capable of smoothing jagged edges on foliage, particle effects and other transparency-based game elements, unlike MSAA.
Between the two available post-process options, FXAA does a better job at reducing aliasing, but SMAA applies far less blur to scenes, which is especially important at lower screen resolutions. Take a look below to see how the rural, foliage-filled areas are affected.
| Interactive Comparisons | ||
| SMAA vs. FXAA | SMAA vs. Off | FXAA vs. Off |
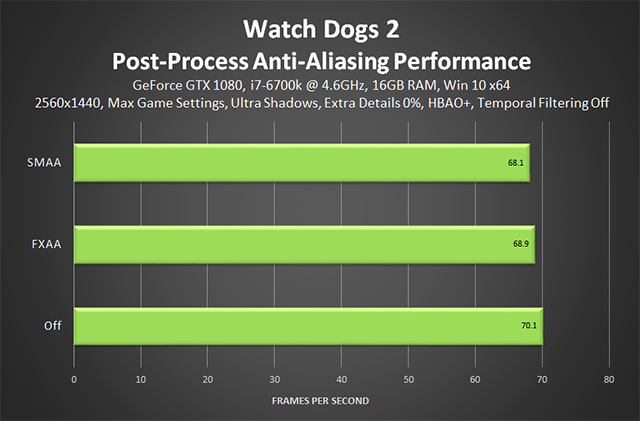
Performance: SMAA, our preferred setting, costs just 2 FPS compared to the 11 FPS of 2xMSAA. And it's only 0.8 FPS slower than FXAA.
Reflections
Confusingly, Watch Dogs 2 has three settings that affect the rendering of reflections in its world. The first, "Reflections", controls the display of approximated reflections on water features, building windows, building interiors, vehicles, and some other shiny surfaces.
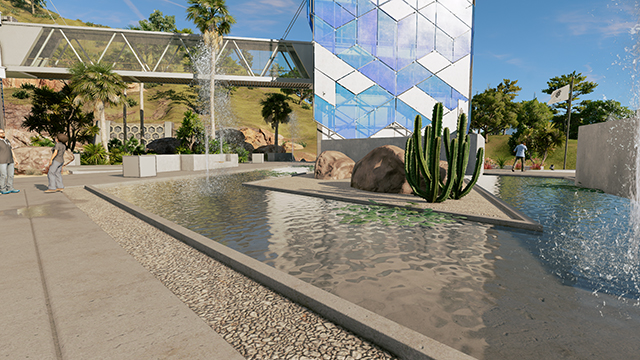
Below, you can see an obvious use of "Reflections", with the water feature roughly reflecting the detail around it. Looking deeper, added reflections can be seen on the puddle on the left and the windows of the skybridge, and by swiping back and forth over this we can also observe an impact on lighting around it due to the lack of approximated or pre-baked light bounces from the surfaces that were reflective when the setting was enabled.
On the right of the scene, you may have spotted that the NPC isn't reflected - that's because the water here isn't affected by "Screen Space Reflections", the second reflections setting. For those reflections, look to wet floors and roads, and specially-selected surfaces in missions and scripted moments. Similarly, if the water shown here was deep enough to swim in, or massive in size, reflections would be enabled and disabled by "Water", the third and final reflection setting.
The big approximated reflections of this setting have a large impact in many scenes, and are particularly important for vehicles, which lose massive amounts of detail, as you can see in the interactive comparison below.
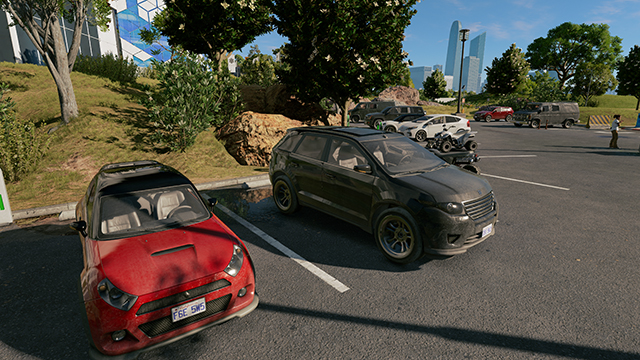
As you drive around, vehicles will show approximated reflections for buildings, trees, foliage, and other game elements, and will also gain improved lighting from the aforementioned approximated and pre-baked light bounces. One thing to note: an extra degree of reflectivity is added by "Screen Space Reflections", which can be seen on the hood of the red car, and on the puddle behind the black car.
Indoors, "Reflections" can enrich and illuminate scenes, further improving image quality.
When "Screen Space Reflections" are disabled, "Reflections" adds some approximated light reflections to wet roads and pavements, noticeably improving image quality, giving low-spec users a better experience. Furthermore, the setting enhances the appearance of individual windows and other illuminated objects at night, as can be seen on the right of the following interactive comparison.
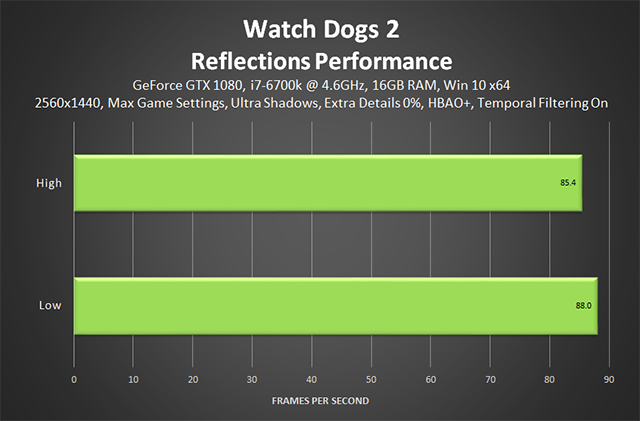
Performance: "Reflections" adds a significant amount of detail to the game world, despite the reflections being mere approximations. And so for less than 3 FPS these reflections are an essential addition to all but the slowest systems.
San Francisco Fog
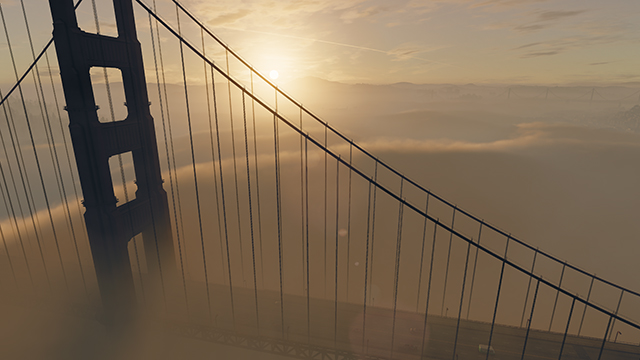
If you've seen our Watch Dogs 2 PC technology trailer you'll have witnessed the beauty of the PC-exclusive Ray Marched Volumetric Fog that stretches across the San Francisco Bay and Golden Gate Bridge, closely matching reality with variable opacity and color.
With the "San Francisco Fog" setting you can enable or disable this eponymous fog:
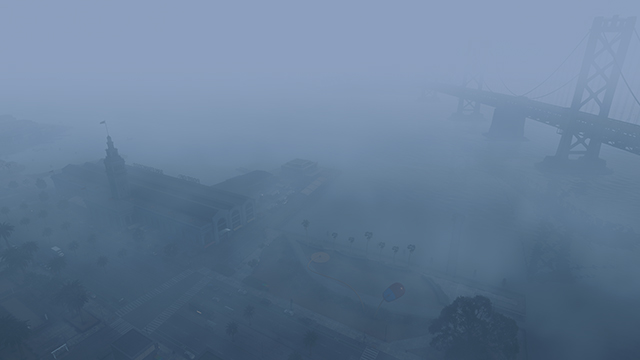
In addition to the gorgeous rolling fog highlighted by the trailer, the game is also capable of rendering lingering fog of different densities and opacities. Inside one of these other fog volumes, the impact of disabling "San Francisco Fog" is far lower:
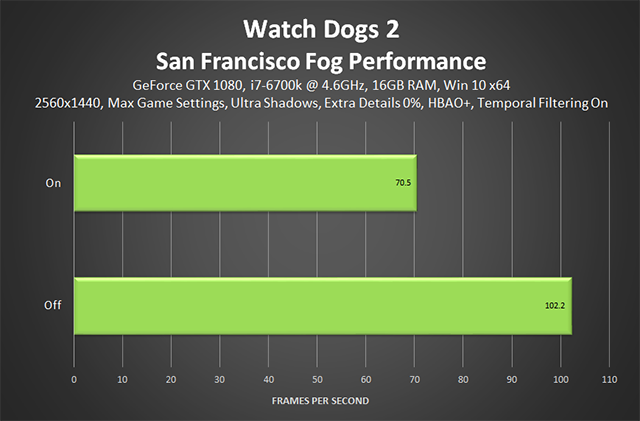
Performance: Jaw-dropping Ray Marched Volumetric Fog can cost up to 30 frames per second when it rolls in. At other times, however, you might see a lower-density fog or a mere haze, and these range in cost from a few frames per second to 10 or 20 frames per second.
Unfortunately, there's no repeatable benchmark for each type of fog or haze, so your best bet is to enable the setting and see how you fare. If you observe FPS going beneath your comfort threshold disable "San Francisco Fog" and see if performance improves by a meaningful degree - if not, look to other settings for increased performance and enjoy the improved image quality from having the setting enabled.
Screen Space Reflections
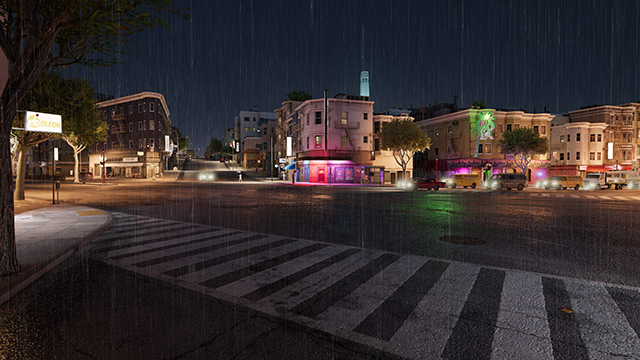
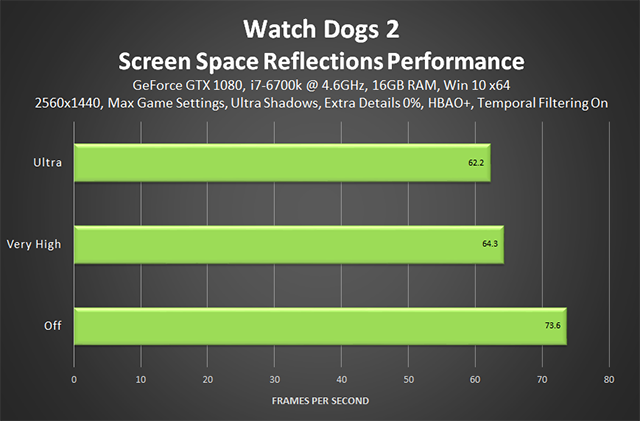
As already discussed, there are three settings that control reflections in Watch Dogs 2: "Reflections", "Screen Space Reflections", and "Water". "Screen Space Reflections" most visibly add high-quality, real-time reflections to rain-drenched roads and pavements, to select surfaces in enclosed missions and buildings, and to select surfaces and objects in in-engine cutscenes and cinematics.
With the Ultra detail level, reflected detail is rendered further from the source, enabling reflections to stretch across the scene, as shown in the interactive comparison below.
| Interactive Comparisons | ||
| Ultra vs. Very High | Ultra vs. Off | Very High vs. Off |
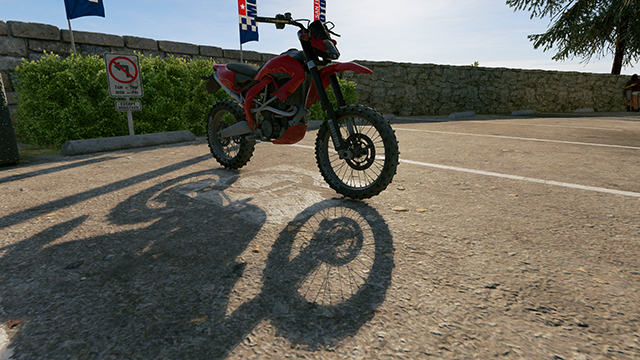
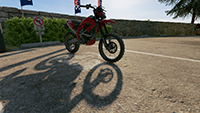
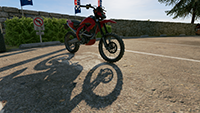
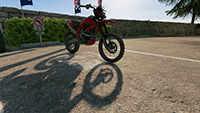
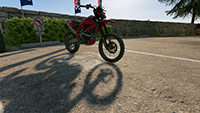
Ultra also increases the fidelity of some reflections, as you can see around the bike in the comparison below, and adds some subtle real-time reflectivity to wet grass and foliage.
| Interactive Comparisons | ||
| Ultra vs. Very High | Ultra vs. Off | Very High vs. Off |
As also discussed earlier, "Screen Space Reflections" adds further reflective detail to vehicles, in addition to the detail added by the "Reflections" setting. In the example below, focus on the roof of the red car, and the puddle behind the black car.
| Interactive Comparisons | ||
| Ultra vs. Very High | Ultra vs. Off | Very High vs. Off |
Performance: A wet day or night leads to an extensive number of real-time reflections being rendered, and at those moments Very High costs 9.3 FPS, and Ultra 11.4 FPS. If disabled, some reflectivity will remain thanks to "Reflections", so it's not a total wash if you can't afford to use this comparatively expensive setting.
Shadows
For several years our Percentage Closer Soft Shadows (PCSS) shadow technique delivered the best possible shadow map shadows in several blockbuster games. Earlier this year, however, we introduced the world to a new, even-better technique called NVIDIA Hybrid Frustum Traced Shadows, henceforth referred to as "NVIDIA HFTS".
This technically-advanced, groundbreaking shadow technique leverages hardware features of NVIDIA GeForce GTX 900 and 10-Series graphics cards to create realistic, geometrically-accurate hard shadows, which smoothly transition to soft shadows in real time. These shadows substantially improve upon those generated by existing techniques, including NVIDIA PCSS, to deliver the highest-quality shadows seen to date in gaming, with near-perfect contact shadowing and vastly improved screen-wide shadowing.
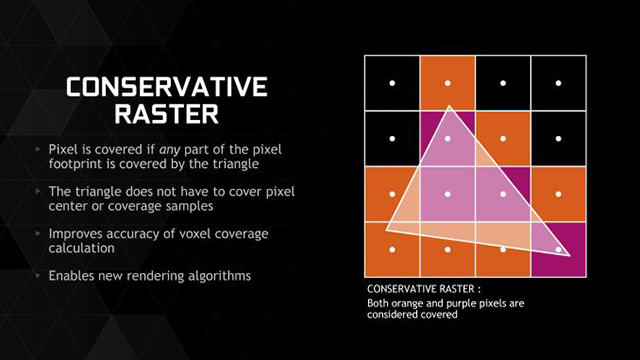
To achieve this feat several technologies and techniques are utilized. The first and most important being Frustum Tracing, a form of Ray Tracing that runs far faster, yet is still highly accurate. This is a direct result of NVIDIA HFTS's Frustum Tracing utilizing Conservative Rasterization, a technology built into NVIDIA GeForce GTX 900 and 10-Series graphics cards.
With Conservative Rasterization, errors and missed details from the faster Frustum Tracing process can be corrected, delivering a shadow that's close to the quality of one created by Ray Tracing, but at a fraction of the performance cost. By drastically reducing this cost the technique becomes suitable for real-time graphically-advanced games, which can't be said for traditional Ray Tracing that renders at only a few frames per second in heavily optimized, small-scale tech demos.
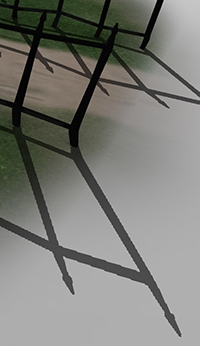
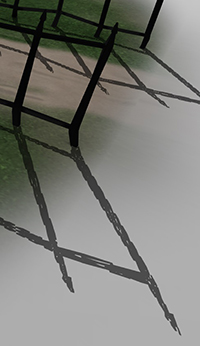
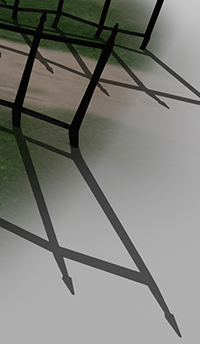
From left to right: a regular shadow map, as seen in most games; a Frustum Traced shadow; and a Frustum Traced shadow with Conservative Rasterization applied.
After Frustum Tracing has created a near-perfect 'hard' shadow, the shadow needs to be softened to mimic reality, where a 'hard' shadow transitions to a 'soft' shadow as the distance from the shadow caster increases. For that we employ Variable Penumbra Soft Shadow Filters, much the same as the ones employed by our Percentage Closer Soft Shadows (PCSS) technique, which has applied progressive softening to the shadow maps of several games.
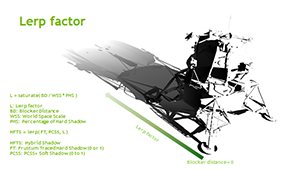
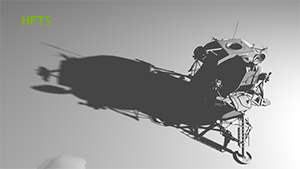
A look at how soft shadows are created with HFTS, and the final output as it would be rendered in a game.
Finally, we add low-cost Post-Process Anti-Aliasing to smooth the edges of the shadows.
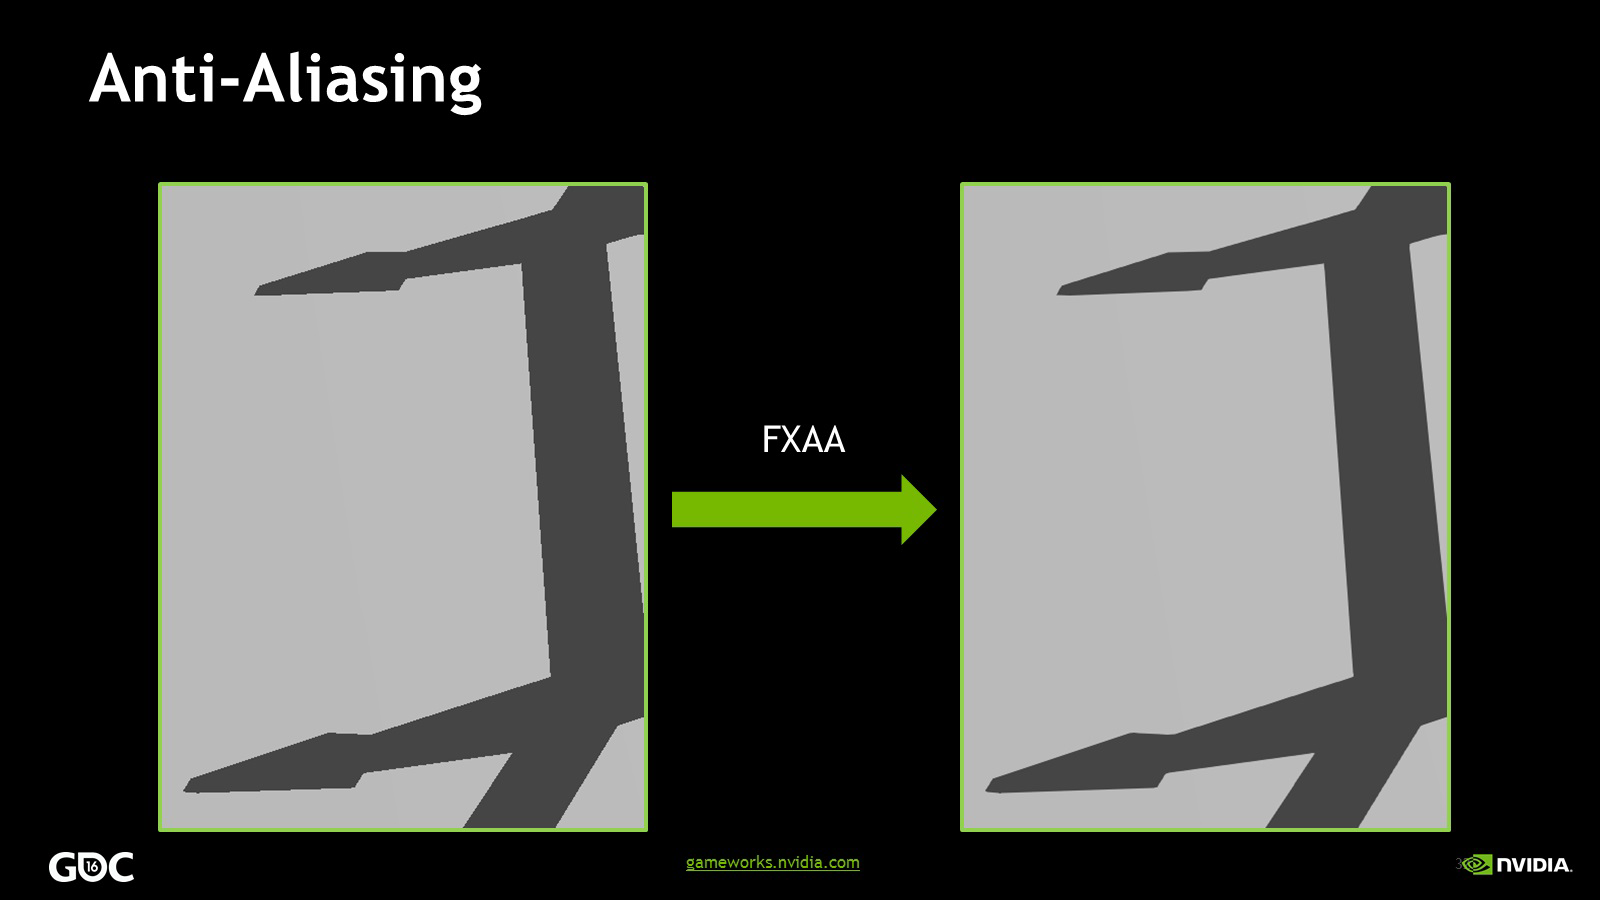
Together these techniques form NVIDIA HFTS, the highest-quality shadow rendering technology seen to date. Shadow detachment, aliasing, and interference from overlapping blockers are all overcome, creating near-perfect geometrically accurate and precise shadows, which soften as the distance from the shadow caster increases.

Click to load an interactive comparison exemplifying the benefits of NVIDIA HFTS
The first game to feature NVIDIA HFTS was Tom Clancy's The Division, and now NVIDIA HFTS is enhancing Watch Dogs 2, delivering the same significant improvements to image quality.
Our first interactive Watch Dogs 2 comparison mimics the jaw-dropping scene from our Tom Clancy's The Division Graphics and Performance Guide, which debuted NVIDIA HFTS to the world. As is clear to see, NVIDIA HFTS renders crisp, fully-detailed, fully-accurate, aliasing-free shadows at close range, softening shadows as they stretch away from the source. This same level of detail is applied to all close-range shadows game-wide, greatly improving image quality for the duration of Watch Dogs 2.
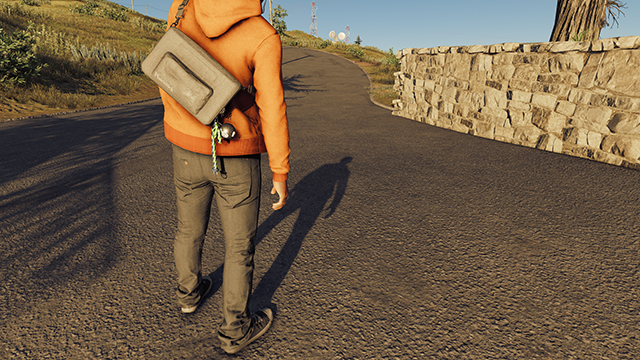
NVIDIA HFTS's improved accuracy and fidelity also enables it to render shadows for the smallest details on your character's back, and to improve the quality of shadowing around creases and folds in clothing, and between layers of clothing.
NVIDIA HFTS and PCSS also utilize higher-resolution shadow maps across longer distances, ensuring distant soft shadows are rendered with increased levels of detail for as far as the eye can see. In this set of comparisons, observe the image quality of shadows near the vehicle and on the far left wall to see how shadows are affected.
Finally, here are two sets of additional comparisons demonstrating image quality in different scenarios, helping you make an educated decision on which shadow setting to use.
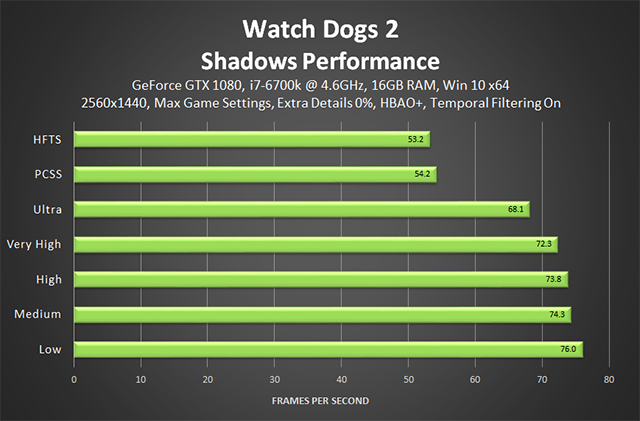
Performance: NVIDIA HFTS shadows greatly improve image quality, though as you would expect utilizing advanced techniques and higher-resolution shadows does come at quite the cost. Specifically, 15 FPS more than Ultra, which is itself 4.4 FPS slower than Very High.
If you've got a high-end GPU NVIDIA HFTS is most certainly recommended, enhancing every moment throughout the entire game with realistic hard and soft shadows. If you'd prefer sharp shadows everywhere, all the time, opt for Ultra instead.
Temporal Filtering
If you're interested in graphics technology, you've probably heard a lot of talk about "checkerboard rendering" in relation to the PlayStation 4 Pro in recent weeks. This new, upgraded PlayStation 4 is promoted as being capable of 4K graphics, and given a lower-fidelity game it most certainly is. In high-fidelity games, however, it has to use a clever workaround called "checkerboard rendering" to achieve a higher-resolution image without tanking the framerate.
In simplified terms, checkerboard rendering upscales the resolution from 1920x1080 to 3840x2160, and uses data from the previous frame to create new detailed pixels that fill in the blanks between the pixels that were upscaled, avoiding the blurriness that would otherwise occur. The result is then further improved with other techniques, and smoothed out with anti-aliasing.
This same principle was already achieved in a similar fashion in last year's Rainbow Six Siege, which introduced us to what Ubisoft calls "Temporal Filtering" (page 45-65). That first-take on the idea rendered the same number of depth samples as a full-resolution 1920x1080 picture, but only half the shaded samples, improving performance at the expense of image quality. This manifested as a reduction in the quality and visibility of Ambient Occlusion shadowing, increased shader aliasing, decreased lighting and shading fidelity, and a loss of fidelity on smaller game elements, such as leaves, grass, visual effects and minute pieces of geometry.
In the year since Ubisoft has greatly improved their implementation of the technique, avoiding almost all of the previously-observed pitfalls. Such is the level of improvement, in fact, and the performance of the game with Temporal Filtering enabled, you can increase the resolution from 1920x1080 to 2560x1440 whilst simultaneously benefiting from a faster framerate and improved image quality. Take a look for yourself in our interactive comparisons below.
| Interactive Comparisons | ||
| 1920x1080 On vs. Off | 2560x1440 On vs. Off | 3840x2160 On vs. Off |
| 2560x1440 On vs. 1920x1080 Off | 3840x2160 On vs. 2560x1440 Off | |
Getting up close to the screen during slow-paced gameplay will allow you to see the pixel reconstruction tech in action, but from a general game-playing distance the difference between On and Off is nigh on impossible to detect. Potentially, other developers could follow suit, enabling you to increase image quality and performance with a flick of a switch, without decreasing the quality of other settings.
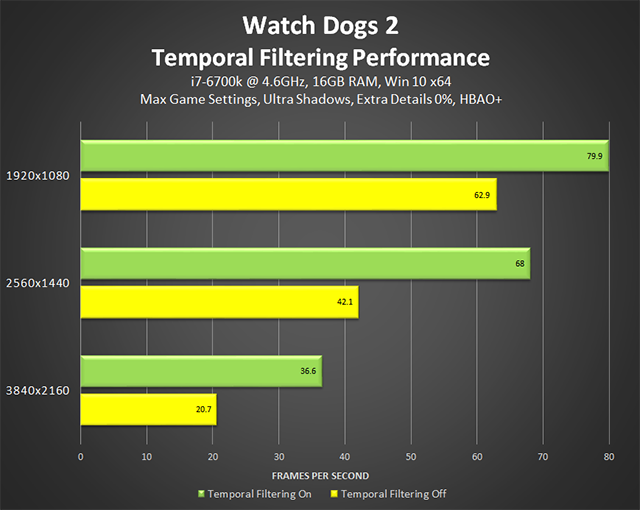
Performance: Looking at the numbers below you can see why Temporal Filtering, checkerboard rendering, and similarly named techniques are so popular on consoles.
In our testing, we found 2560x1440 to be the sweet spot for "Temporal Filtering", giving us a 60 FPS experience with improved image quality. To set this up on a 1920x1080 monitor you'll need to activate NVIDIA Dynamic Super Resolution, as detailed later in the guide.
"Temporal Filtering" is, in our opinion, a revolution for gaming, enabling significant bumps in image quality and performance, without a reduction in detail of other settings. Essentially, free performance with no readily-seen drawbacks.
Terrain
The fidelity of terrain far in the distance changes ever so slightly when moving this setting down from Ultra to High, followed by highly visible changes in the foreground on Low, as shown below.
| Interactive Comparisons | ||
| Ultra vs. High | Ultra vs. Low | High vs. Low |
The changes to shading, blending and clarity cause shadows to shift for some unknown reason, though the shadows themselves appear untouched in terms of quality.
| Interactive Comparisons | ||
| Ultra vs. High | Ultra vs. Low | High vs. Low |
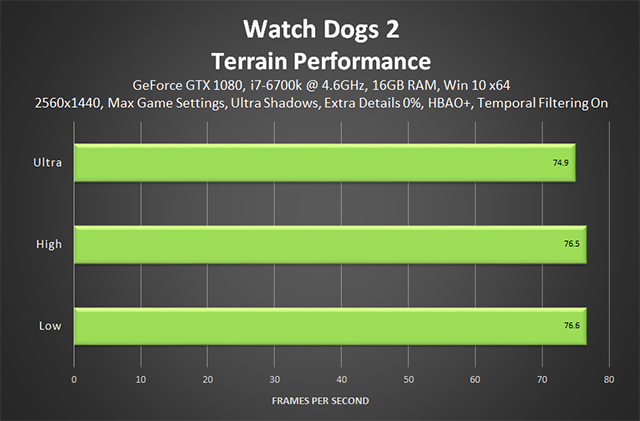
Performance: As the "Terrain" setting has no impact on the geometric detail of terrain, the performance cost of this setting is negligible.
If you don't mind a slight reduction in the detail of distant terrain, select High to save 1.6 frames per second.
Texture Filtering
"Texture Filtering", Anisotropic Filtering, and other similarly named options affect the sharpness of textures, especially those seen in the distance, on oblique angles, or on the sides of the screen. Without filtering, surfaces appear blurry, and image quality is significantly degraded.
Interestingly, in Watch Dogs 2 lower detail levels have a greater impact on tree and object clarity than they do textures, which blur just a smidge.
| Interactive Comparisons | ||
| Ultra vs. Very High | Ultra vs. High | Ultra vs. Low |
| Very High vs. High | Very High vs. Low | High vs. Low |
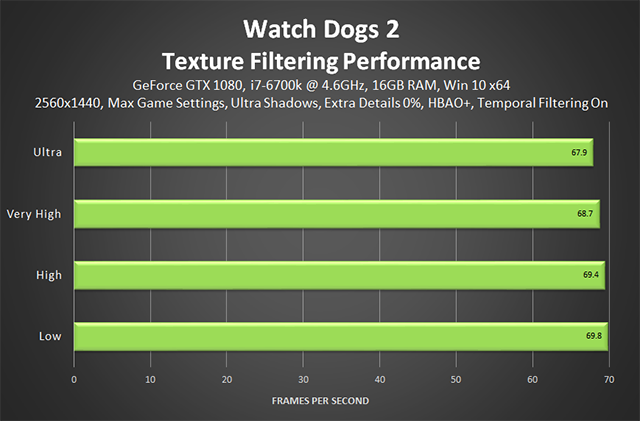
Performance: At 2 FPS, Watch Dogs 2's anisotropic filtering has a slightly higher cost than usual, but still, it's recommended to max it out for the highest possible fidelity and clarity game-wide.
Texture Resolution
Watch Dogs 2's texture quality setting adjusts the fidelity and clarity of every texture, affecting every surface and object in every moment of Watch Dogs 2.
Capturing like for like comparisons is a struggle thanks to enforced client restarts, so ultimately we chose the area below to exemplify the quality of textures seen in the game, and what happens to them as the detailed level is dialed back.
| Interactive Comparisons | ||
| Ultra vs. High | Ultra vs. Medium | Ultra vs. Low |
| High vs. Medium | High vs. Low | Medium vs. Low |
You may have to zoom in on downloaded copies of the individual images to see that Ultra adds an extra level of refinement - additional relief is rendered on the illuminated wall on the top left, as well as on other walls around the scene, slightly sharper wood textures are seen, clothing textures have clearer fabric detail, and floor textures are sharpened by a noticeable degree. Further down the detail level ladder, meanwhile, noticeable blurring creeps in at Medium, with many of the little details in textures being lost.
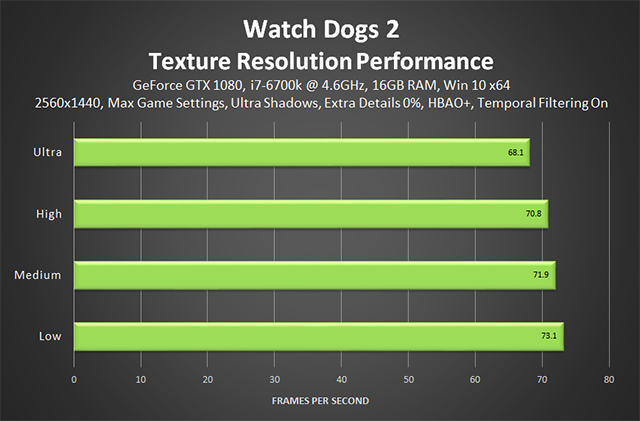
Performance: Loading the game's highest-quality textures costs a few frames per second, though we imagine most folks are asking, "how much VRAM do I need?" Good news, you can see for yourself, because the settings menu has a real-time VRAM meter that displays the maximum amount of memory that your chosen settings will consume. In our testing, usage was below 8GB with max settings and Post-Process Anti-Aliasing at 4K, so anyone with a recent high-end graphics card will able to use Watch Dogs 2's max-quality textures.
P.S. Depending on where you bought Watch Dogs 2, you may have to download a free DLC to get the Ultra-quality textures - if you can see the "Ultra" option in-game, you have the textures. If you can't see the option, check the digital distribution service your game key is tied to, for example Steam or Uplay, and look for the option to download the Ultra textures. This free install adds over 10,000 4K-quality textures, "ultra resolution" decals, and "huge" normal and surface maps.
Vegetation
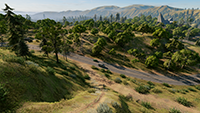
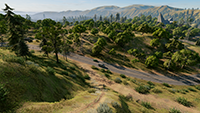
To improve performance, lower-quality tree models can be rendered in the background, though as you'll see below the downgraded trees still look pretty good.
| Interactive Comparisons | ||
| Ultra vs. High | Ultra vs. Low | High vs. Low |
| Interactive Comparisons | ||
| Ultra vs. High | Ultra vs. Low | High vs. Low |
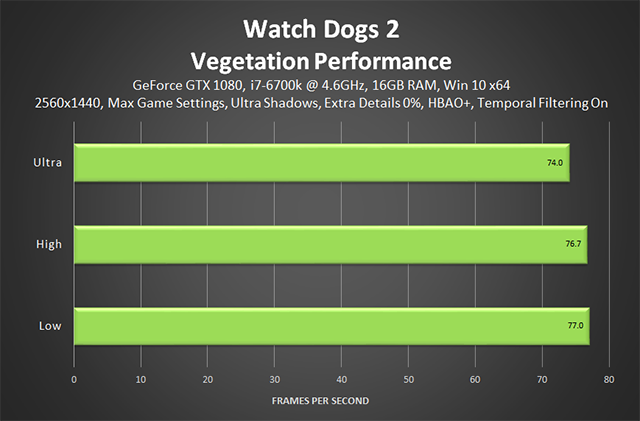
Performance: At most, you'll save 3 frames per second by decreasing the quality of distant tree models, which may help in a pinch.
Water
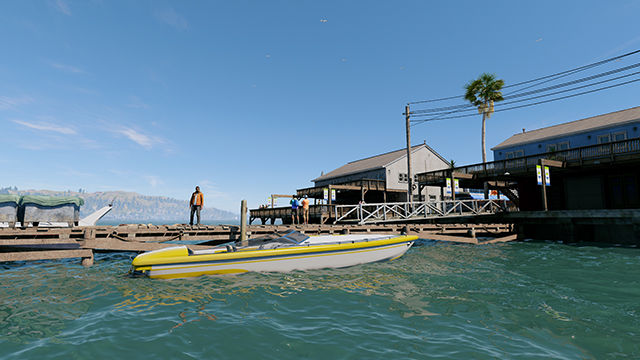
Watch Dogs 2's final setting enables and disables the rendering of real-time reflections on large bodies of water, such as the San Francisco Bay. With High selected, boats, large objects, large buildings, and other game elements are reflected on the water's surface, greatly improving image quality, independent of selected "Reflections" and "Screen Space Reflections" options.
Near the Bay, a large, shallow body of water receives reflections from the "Water" setting, including building reflections that in other spots, on smaller bodies of water, come courtesy of "Reflections".
In-game, the settings menu also mentions changes to the quality of water rendering, though in our testing we observed no loss of detail on tessellated waves and wakes, and no simplification the water simulation or physics.
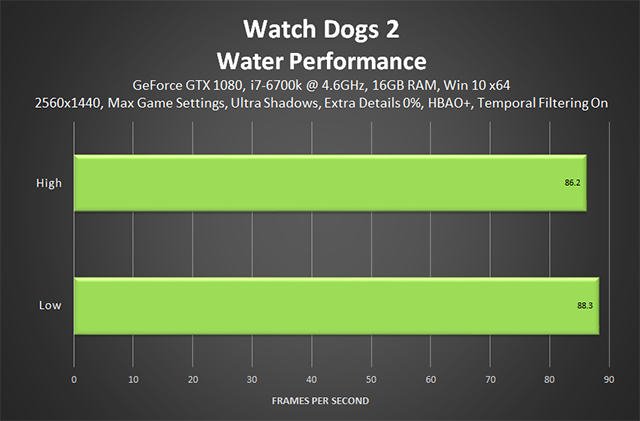
Performance: Surprisingly, the excellent reflections cost only 2-3 frames per second in every scenario we tested, and as such should be enabled on all but the slowest configs due to their highly visible influence on image quality.
Settings Wrap-Up
Watch Dogs 2 is a performance-intensive title on the Ultra preset, but with the amazing "Temporal Filtering" enabled we can accelerate the Ubisoft-recommended GeForce GTX 1060 to 59.9 FPS, just 0.1 FPS shy of the desired 60 FPS.
At 2560x1440, a GeForce GTX 1080 or heavily overclocked GeForce GTX 1070 is recommended, and at 3840x2160 the closest you'll get is 50.6 FPS on a NVIDIA TITAN X, though a good dose of overclocking may also do the trick there.
Unfortunately, "Temporal Filtering" frame reconstruction is incompatible with all multi-GPU solutions, so those configurations were tested without its benefits. As the chart shows, performance is below that of a single GPU of the same type due to limited scaling in the game's CPU-bound locations.
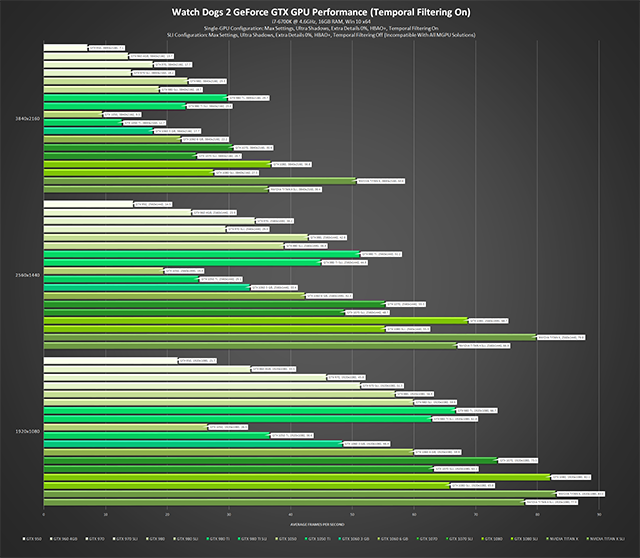
Click to enlarge. All GPUs running at reference speeds with stock coolers
For a direct comparison between single GPU and multi-GPU performance, we switched "Temporal Filtering" off for a second set of benchmarks:
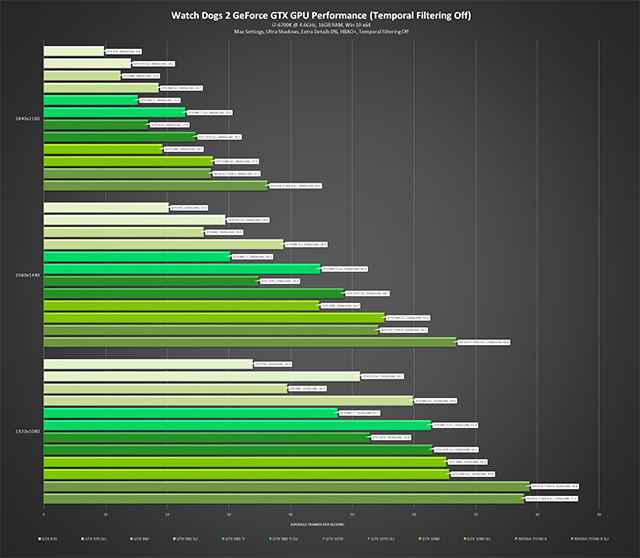
Click to enlarge. All GPUs running at reference speeds with stock coolers
If you wish to improve performance enable "Temporal Filtering" if you haven't already done so, and seriously consider overclocking your CPU - the faster your CPU the more your GPU can be utilized in CPU-bound situations, in turn improving your framerate. If that scares you silly, you can dial down several settings without affecting image quality too significantly:
- Bloom: Save a frame per second by switching off the subtlety-used Bloom - every little bit counts!
- Depth of Field: A few scenes and cinematics will look less stylish without DoF, but during gameplay you'll save nearly 2 FPS
- Extra Details: The most CPU-intensive setting in the game will seriously strain older and slower CPUs, heavily bottlenecking your GPU's precious performance
- Headlight Shadows: Having extra shadows cast from 2 cars instead of 4 will save you nearly 2 frames per second, and switching to "Your Car" will save a total of 3.5 FPS
- Motion Blur: Switching off this divisive setting will save you a frame per second
- Multisample Anti-Aliasing: If you lack the horsepower or hardware for TXAA, it's best you skip straight to post-process SMAA to save a ton of frames
- San Francisco Fog: It's a shame to cull the full-density, full-quality fog, but it costs 30 FPS. When it's the other types of fog and haze, improvements will range from 3-20 FPS
- Screen Space Reflections: The cost of the setting varies wildly depending on conditions, and setting it to Very High instead of Ultra will save you a bit of performance every now and then
- Shadows: If NVIDIA HFTS and Ultra are too demanding, look to Very High, the last detail level before shadows lose a considerable degree of detail
- Terrain: High runs 1.6 FPS faster than Ultra, and the difference between the two is imperceptible during gameplay in almost all locales
- Vegetation: Low-quality trees look fine, and save you 1.4 FPS
Alternatively, try our one-click GeForce Experience Optimal Playable Settings to immediately discover optimum settings for your system.
NVIDIA Dynamic Super Resolution (DSR)
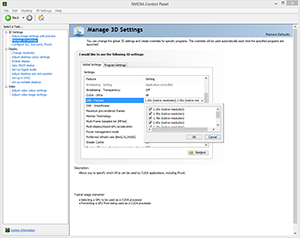
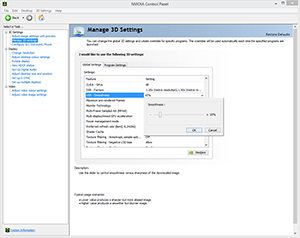
If you have performance to spare, increase the quality of your graphics even further by activating NVIDIA Dynamic Super Resolution (DSR) to receive up to 4K-quality graphics on your HD monitor. How it works is simple: games are rendered at a higher, more detailed resolution, and the image intelligently shrunk back down to the resolution of your monitor using a custom-made filter, giving you up to 4K-quality graphics on your screen. The video below explains more, and the images show how to activate the setting in the NVIDIA Control Panel.
With DSR enabled, textures benefit from improved clarity, aliasing is further reduced, objects have better definition, vegetation is more detailed, and distant game elements are clearer.
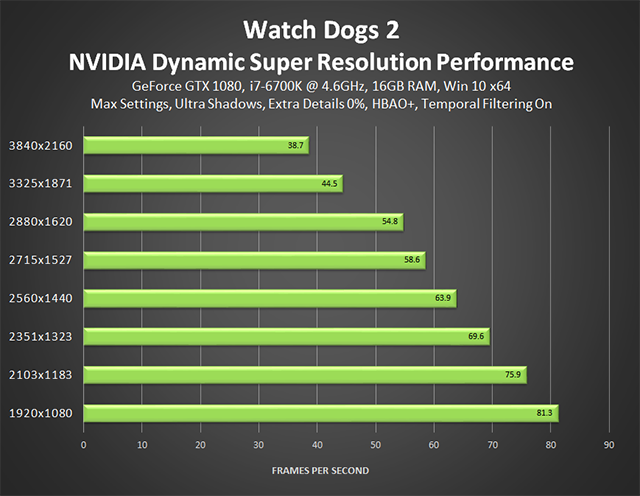
Performance: Using a Founder's Edition GeForce GTX 1080, the DSR rendering resolution was increased in a benchmark that is representative of Watch Dogs 2's most demanding GPU-bound moments. These are the results:
GeForce Experience: Optimal Playable Settings With A Single Click
The best way to automatically configure and apply Watch Dogs 2's 19 game settings for a smooth, enjoyable, 60 FPS experience is through GeForce Experience, an invaluable tool for all GeForce GTX users. In addition to optimizing over 400 games, the free GeForce Experience application can automatically update drivers and profiles, record and stream gameplay with Share, get your free games and GPUs with in-client giveaways, and wirelessly stream PC games to NVIDIA SHIELD devices.
Taking into account your GPU and CPU, as well as many additional factors, GeForce Experience's game recommendations can be applied with a single click and are updated over time should developer patches and NVIDIA driver updates improve performance further still. This one-click solution is perfect for gamers who wish to simply play their games, and for those with little experience in configuring settings for an optimal experience.
Game Ready Watch Dogs 2 Driver

Talking of drivers, be sure to download our new GeForce Game Ready drivers from GeForce Experience for the best Watch Dogs 2 experience. Included are the latest performance optimizations and tweaks for Watch Dogs 2, along with a SLI profile for the game.
Overclocking
Many GPUs, CPUs, and sticks of RAM can be overclocked, giving you free performance that makes your games run even faster. If overclocking is new to you, take a look at our GeForce Garage guide to get started, and other similar guides on the Internet for your specific CPU, GPU and motherboard.
It's easy and straightforward these days, and double-digit improvements are easily obtained, taking a 50 FPS system to 60 FPS+. This is especially important in Watch Dogs 2, which is CPU-bound in some scenes, especially when "Extra Details" is enabled.
G-SYNC: Eliminating Stutters & Tearing For The Ultimate Experience

NVIDIA revolutionized computer displays in 2013 with the introduction of variable refresh rates, enabling gamers to enjoy highly responsive, tear-free, stutter-free experiences on G-SYNC monitors. Reviews are phenomenal, and gamers everywhere agree that it's painful to play on anything other than a G-SYNC display once you're used to the flawless experience it provides.
With Watch Dogs 2's and G-SYNC monitors, you can play in optical bliss with none of the artifacts or hang-ups associated with ordinary monitors or TVs.
And now you can get G-SYNC panels in laptops, too, in a variety of resolutions, and with refresh rates up to 120Hz. Learn more here.
NVIDIA Surround
If your system is sporting three monitors with identical resolutions, you can enable NVIDIA Surround in Watch Dogs 2, giving you a super-wide field of view, in turn allowing you to see significantly more of the game world as you play. To give you a taste, here are a few shots taken on max settings in Surround at 5760x1080.
If you instead opted for an Ultrawide 21:9 monitor, you'll be pleased to hear that Watch Dogs 2 natively supports the increasingly-popular aspect ratio, too.
The Definitive Watch Dogs 2 Experience
Watch Dogs 2 on PC is the definitive experience, thanks to higher rendering resolutions, increased levels of detail, PC-exclusive effects, extra configuration options, and support for HBAO+, HFTS, PCSS, TXAA, G-SYNC, GeForce Experience, GeForce Experience Share, DSR, GameStream, SLI, and Surround. And soon, NVIDIA Photo Mode, too.
If you lack the necessary hardware to utilize the aforementioned technologies, and wish to upgrade your system to experience Watch Dogs 2 The Way It Was Meant To Be Played, purchase participating GeForce GTX 1080 and 1070 graphics cards, systems and laptops to get a free copy of Watch Dogs 2 for a limited time. Full details can be found on the Watch Dogs 2 bundle landing page.
If you do intend to buy an eligible GeForce GTX GPU, system or laptop please ensure the seller is participating in the Watch Dogs 2 GeForce GTX bundle; NVIDIA cannot provide download codes and coupons for purchases made at non-participating retailers and e-tailers.
